


Description
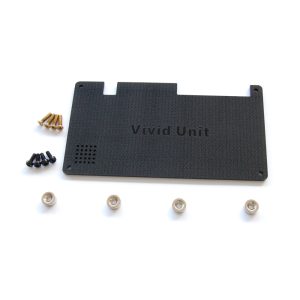
This is the cooler panel for Vivid Unit, which includes:
- Aluminum PCB panel x 1
- Copper heatsink (with adhesive thermal tape) x 1
- Metal screw x 4
- Thermal pad x 1
This is an active+passive cooling solution for Vivid Unit, with name “VCOOL”. The Aluminum panel acts as a circuit board for driving the mini blower fan, as well as a huge heatsink for Vivid Unit. The mini blower is controlled by the software, which keeps monitoring the CPU and GPU temperature and control the fan speed accordingly. The diagram below demonstrates how it works.
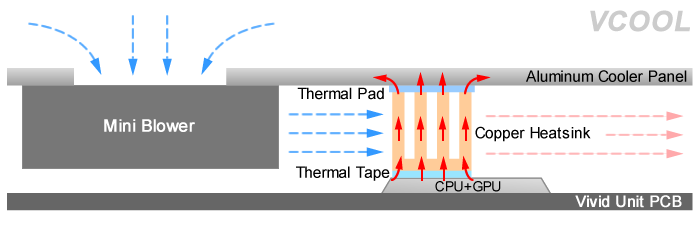
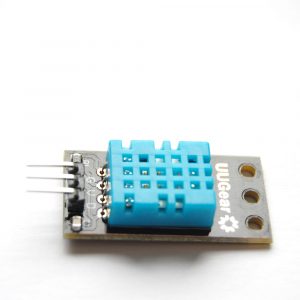
There is a blue LED on the cooler panel, which indicates the status of the mini blower fan.
Software Installation
You will need to install the “vcool” software for controlling the mini blower fan on the cooler panel. Just run:
sudo apt update

sudo apt install vcool
And then after rebooting the device, the vcool software will run in the background. It monitors the temperature for CPU and GPU and control the fan speed via GPIO4_D1. The strategy to control fan speed is defined in file “/etc/vcool/vcool.stg“. It is a pure text file and its default content is like this:
C65|G62 F100
C60|G54 F80
C55 F65
C50 F50
It is very simple and straightforward. Every line defines a rule. A rule consists a condition and a fan speed, and they are separated by a space. For example, “C55 F65” means setting the fan speed to 65% when CPU temperature reaches 55 celsius degree. Condtion can be combinated with “|” (logic OR) or “&” (logic AND) . For example, “C60 | G54 F80” means setting the fan speed to 80% when CPU temperature reaches 60 celsius degree or GPU temperature reaches 54 celsius degree.
Remarks: these rules will be loaded and parsed by software one by one in order. If the condition for one rule is satisfied, and fan speed is set by that rule and the rules afterward will be ignored. That means the eariler rule has higher priority, and we should define fastest fan speed with highest temperature requirement first.
The default vcool.stg file works fine. However you can define your own strategy by modifying this file, if you prefer. Newly modified vcool.stg will take effect after rebooting the device.
The log of the software can be found in “/var/log/vcool.log” file.
The source code of this software can be found here: https://github.com/uugear/VCOOL
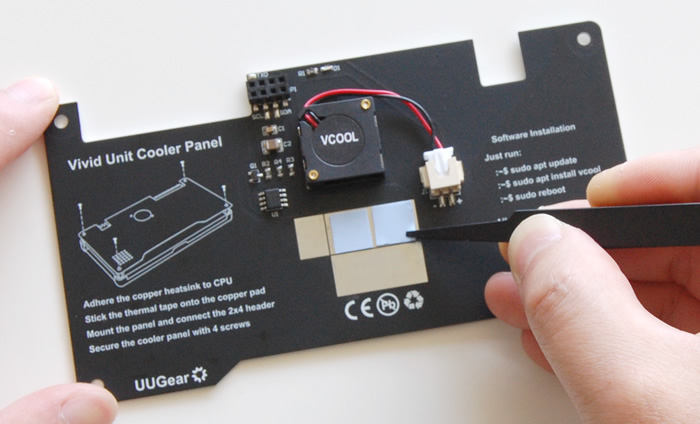
Assembling the Kit
The first step is to pill off the protecting membrane on the back of the copper heatsink, and then paste the heatsink on the upper part of the RK3399 metal cover. As shown below:
Then pill off the protecting membrane on both sides of the thermal pad.
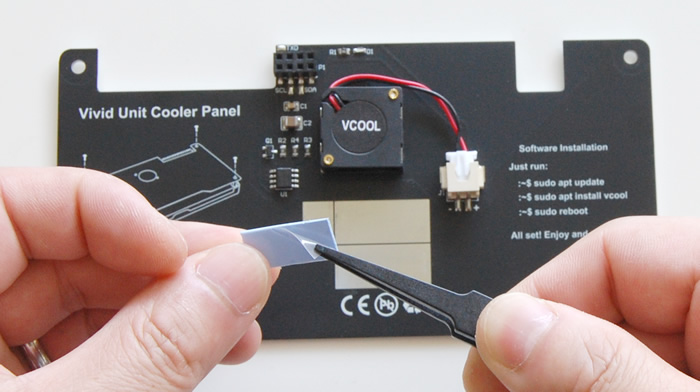
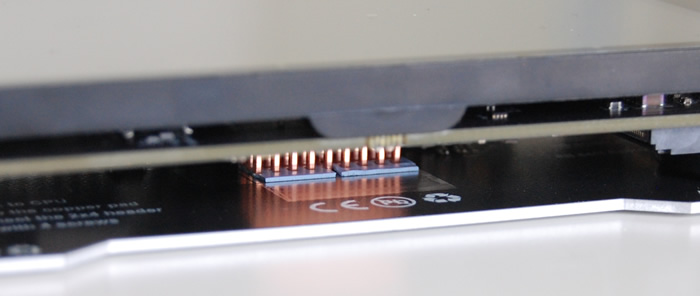
The thermal pad is separted as two pieces (we replaced them with single big piece since 2024.10.28), and you can place them on the cooler panel, within the area shown in the photo below. The thermal pad is soft and has weak adhesion, you may adjust its position with tweezers until you are satisfied.
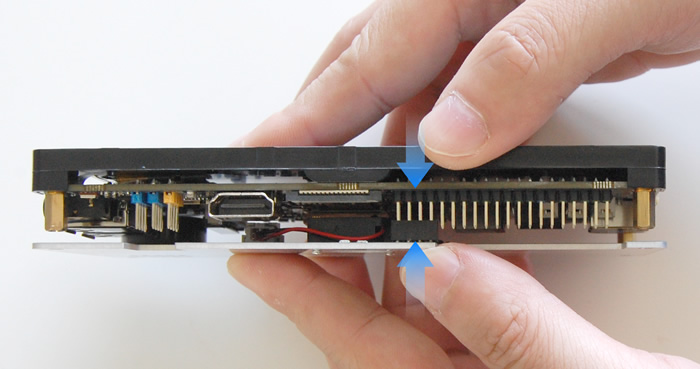
Now you can mount the cooler panel on the back of your Vivid Unit. Make sure the 2×4 pin header on cooler panel connects to the left 2×4 pins on Vivid Unit’s GPIO header. Also pay attention to the thermal pad on the cooler panel, and ensure they are well contacted by the top of copper heatsink.
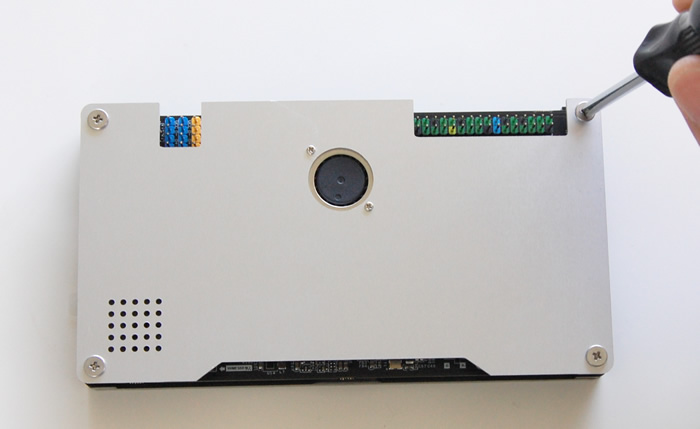
Secure the cooler panel with 4 metal screws:
All set! Enjoy and stay cool 🙂
Other Information
Other information about this cooler panel, including schematic and mechanical drawing, can be found in this page:
https://www.vividunit.com/cooler-panel-kit

Ethan999 –
It is very simple and works pretty well!